Paper Flower How-To


It seems that paper flowers are everywhere we look recently. Whether as fancy centrepieces, wedding decor, or birthday party backdrops, these delicate beauties are cropping up all over the place and we are so, so on board. We tried our hands at making our own a few months back for my wedding and got to experience that rare and glorious moment when a DIY actually works out as planned. Seriously, if you can wrangle all 3 of the supplies needed (we love a short shopping list!) you can make these flowers. 
We ended up making a variety of different types of flower, but here's our how-to for our favourite, the peony:


Step 1: Gather a glue gun (and plenty of glue refills), a good pair of scissors, and crepe paper in whatever colour you'd like to work in. As far as the type of crepe paper, you're going to want something tough enough to stand up to a little manipulation. The sturdier the grade of paper, the more able you'll be to mimic the sculptural quality of real flowers. Carte Fini worked wonders for us (we ordered through their website as they have no Canadian stockists we could find) and we'd definitely recommend using them. The quality and range of colours they offer were the best we could find anywhere, period.

Step 2: Cut out a couple strips of crepe paper (about 1.5" wide), making sure to cut in the same direction as the grain (you want those little ridges/wrinkles in the paper to be moving in the same direction they would in a real petal, from the centre of the flower out towards the edge of the petal). Cut each strip in half twice and you should be left with 4 equal rectangular sections. 

Step 3: Take inspiration from nature and trim the edges of each rectangle of paper until they roughly resemble peony petals. Don't worry too much about making each petal the same-- we want as much variety as possible, just like the real thing!


Step 4: Working with one of the petal strips, grasp one end in each hand, with your thumb held firmly against the paper, and pull apart in a gentle, rubbing motion. This is where the magic happens people! The motion should stretch and smooth out the wrinkles in the centre of the crepe paper, creating a natural curve, similar to the shape of a real petal. Experiment by doing the same to the very edge of the petal to see how realistic you can get the details-- have fun with it!

Step 5: Loosely roll up one of your newly formed petals to begin creating the bud of the flower. Secure with a dot of hot glue. Once dry, loosely wrap a new petal around the first, holding everything in place with hot glue once you're satisfied with the position/look. Continue in the same way, making your way around the bud, until you're happy with the size and shape. A good tip is to play around with positioning the petal just how you like it before you actually apply any glue to the paper-- this way you're not rushing to place anything before the glue dries!


Step 6: Once you're happy with the centre of the flower, repeat the process with petals gradually increasing in size. Take your time with this, so that the move from small to large petal isn't abrupt, but rather looks natural. You can tug and adjust the paper as you see fit to create a more open or closed peony. 
There you have it folks! Gorgeous, fool-proof paper flowers. You can go as small or large as you want-- we super-sized ours to really wring out every drop of wow-factor ;) Depending on the scale, you may have to add additional support to the frame of your flower to keep those giant petals in place. We did this by creating papier-mâché bowl shapes that literally cupped the inner portion of our flower. Then we simply built out from there by glueing the next petals to the outside of the papier-mâché bowl structure until it was completely covered.


If you're like us and get crazy excited by how easy these are to make, go ahead and experiment with different types of flower! We made dahlias and a bunch of roses. There's really no end to the inspiration out there, so go for it-- you got this girl. 


Vegetarian Eggplant 'Meatballs'


My family eat a predominantly vegetarian diet, so I am always on the hunt for delicious meat-free alternatives to some of the classic meat dishes. I found this awesome recipe on a Pinterest binge (you know the ones 😉). We tried out the recipe over the weekend, and can honestly say it is as delicious as the meatballs you know and love! My whole family had this for dinner, including my 10 month old daughter who couldn't get enough. Vegetarians should all try this - it's so yum, but meat lovers should also give it a go for a meat free day, you won't regret it (bonus: if your kids won't eat their vegetables, this is a suuuper sneaky way of getting them to eat eggplant, they would never know)! We used just a twist of salt instead of the amount called for in the recipe, but that is all down to your taste. Enjoy! 

2 Ingredient DIY Dog Treats

DIY

With the arrival of our loveable rescue pup, Abe - we have been obsessed with everything pet-related! To keep us busy during the torturous wait to meet him, we made our little Abe some yummy treats to welcome him to his forever home :) 

These are SO easy to make, and the best thing is you can choose the flavour and change it up depending on what your dog likes, or what you have on hand (just make sure there is no onion in the food). If you have a baby, chances are you wont even need to shop for the ingredients as you already have this stuff in your cupboard! 

You will need: 2 4oz jars of baby food (we chose organic sweet potato and turkey). 
                      1 cup wholegrain oats
                      1 cup wholemeal flour 

Directions: Preheat the oven to 350C, combine the ingredients together, adding more flour if necessary to make sure the dough is firm. Roll out to about 1/4 inch thick and cut into shapes. Bake for about 25 minutes, cool and reward your dog! 

Visit http://www.curbly.com/m/13538-how-to-make-your-own-diy-dog-treats for the original recipe, they have lots of other awesome DIYs to try out too :) 

Happy baking! 

Simple DIY Pet Treat Mason Jars


We had lots of fun making these gorgeous looking decorative jars to store our freshly made organic dog treats! They are so polished looking but so simple to make, your friends will be asking where you bought them!


To make the jars you will need: very strong all purpose glue (make sure the glue you choose is capable of adhering the materials you use), animal figurines like these little cuties we got from http://www.schleich-s.com/, mason jars in the sizes you would like, and some craft spray paint in the colour and finish you would like (you don't have to go with gold, these would look amazing in a neon colour)! 


Step 1: Glue the figurines to the jar lids. It is best to do this while the lid is attached, that way you will ensure the figurine is exactly where you want it to be when the lid is closed. We left our glue to dry for about 10 hours. 


Step 2: Spray the lids! Do this in a well- ventilated area, and make sure you use a protective face mask to prevent inhalation of the fumes. You may need to do this a couple of times to ensure even coverage. Leave to dry overnight.


Step 3: Assemble and enjoy! Fill your jars with anything you like, we are using them to store our pet treats. The options are endless though, so have fun with the figurines and colours you choose! 


Hey Abe!

Anyone who knows me can tell you how much I love dogs. I'm that girl at the party who's sitting on the floor hanging out with the host's dog, or procrastinating at home by watching episodes of Dogs 101 on an endless loop. At our recent wedding, my husband had to sit through an embarrassing amount of speeches from family members giving first-hand accounts of my obsession


And yet somehow, until this weekend, I had never actually owned a dog.

About a month ago Sebastien and I started browsing Petfinder and visiting our local SPCA fairly regularly, hoping to find a pooch that would be the right fit. We needed a quiet pup as we live in a condo building with lots of neighbours, as well as a low to non-existent prey-drive to get along with Gordon, our dwarf parrot. Eventually, we found a 3 year old mix named Wedge at a rescue called Passion4Paws. He was described as a gentle and mellow guy, friendly with kids, dogs and cats-- even chickens! We were sold. 


After filling out the adoption paperwork and a bit of back and forth with the shelter to sort out the details of bringing a dog across the border, a date was finally set for us to pick up our boy. Coincidentally, it ended up falling smack in the middle of National Adoption Weekend! It doesn't get more perfect than that folks. 

We drove the couple hours from Montreal to Vermont, the back seat piled high with dog treats and toys. I was disgustingly excited. Luckily we arrived early enough to kill some time (and nerves) at a local farmers market-- they had donuts guys. Can you say best day ever?


Finally the transport that was delivering Wedge from his native South Carolina to us in Vermont (about an 18 hour drive) arrived and we got our first look at our newest family member. Let me tell you, that guy had to pee. Despite the less than ceremonious first greeting, we were in love.


Wedge, now Abe in honour of his American heritage, has been settling in super well in his new Canadian home. He has napped in almost every room so far and is already charming the neighbours with his good looks. We think he's most likely a Bullmatian-- that is, an American Bulldog and Dalmatian mix-- but who knows. There's certainly no Dogs 101 for him (I've checked) but he's a little love that's snuggled his way in to our hearts. Happy Gotcha Day Abe, we couldn't be happier to have you.


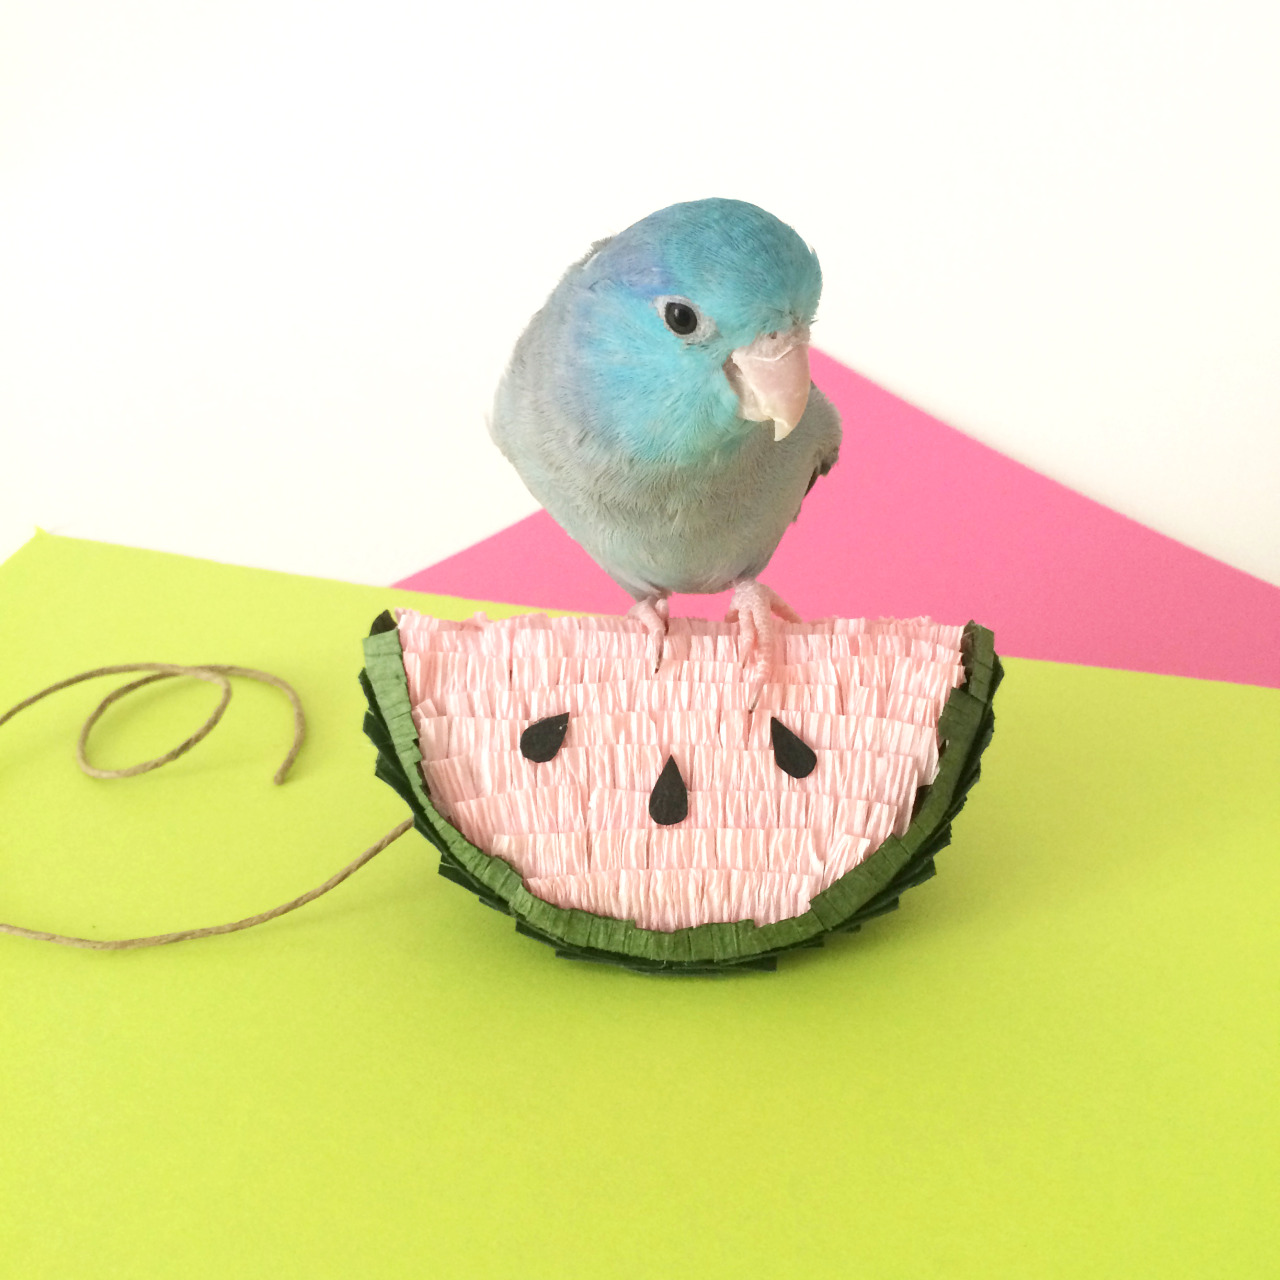
Pint-sized Piñata DIY


 To state the obvious, piñatas are one of the greatest inventions of all time. They deliver delicious candy in an adorable package that you get to smash– perfection. The one and only downside we could think of when it comes to making one of these is the amount of time it requires: let’s face it, a craft that requires more than 24 hours of paper-mâché drying-time is pushing the bounds of what can be considered fun.

Enter the pint-sized piñata. All the fun and charm of your typical piñata, in a teeny-tiny package that takes next to no time to make. This is the future people. There isn’t a room in my home that can’t be made immediately better by the addition of one of these little cuties. Here’s the how-to:


1. Gather a glue gun, scissors, a pencil, twine or string, cardboard (pretty much anything thicker than paper will do), and tissue or crêpe paper in whatever colours you’d like. We went with the standard pink and green watermelon colour scheme– don’t forget a darker shade paper for the seeds!


2. Trace and cut out a circle about the size of your palm, and a long strip of cardboard about the same width as the circle. Fold the circle in half along the centre line.


3. Place the folded circle (which should look like a wedge-shape) on the long strip of cardboard, and cup it in your hand so that the strip follows the edge of the wedge-shape on both sides. Trace the shape with your pencil, then cut it out. Glue along the edge of the resulting diamond-like shape, and press it against the wedge until dry. It should look like the world’s least appetizing watermelon slice at this point. Glue one end of twine to the top, so that you can hang your piñata when it’s finished.


4. Time for the fun part! Cut out strips of crêpe paper and cut little notches along one edge to create a fringe. Glue them down from the flat side of the watermelon up towards what would be the peel, making sure to overlap so you don’t see any cardboard. For the peel, cut out one long strip of paper and wrap it around the edge. Fold the fringe part down and over the pink section. Repeat on the other side, then fill in the remaining space with more strips of paper.


5. Don’t forget the seeds! Three little tear drop shapes on either side should do it.
That’s it! String up your little watermelon wherever you want and bask in its adorableness.


DIY Crochet Baby Bear Hat


Happy Sunday from my little bear! 
I have officially completed my first crochet project, and it wasn’t that hard!! The tutorial I used on YouTube was awesome, and there are plenty more I will be trying out in the near future.


 Go to http://youtu.be/-DfQVzLaKww to try your hand at some cute baby crocheting 😍👶🏼🐻

Facebook